Monday, 20 October 2014

Girly Bits Too Hot For Pants

Today I have a beautiful sparkly polish to show you. I bought this quite recently from Rainbow Connection having fallen in love with the swatches I'd seen of it.
Girls Bits Too Hot For Pants is a seriously intense magenta polish packed with sparkle. The scattered holo is just stunning, picking up so many colours in most level of light. In artificial light I can see red sparkle too. I used to be a no-pinks person, but having picked up Nails Inc Piccadilly Circus as a freebie one year, I discovered I really like deep dark pinks like this, quite cool with the tiniest hint of blue and this one is no exception. I think it goes well with my skin tone and although I have no pink gloves, I like it equally well with both choices or knitwear below :)
I used 2 coats, it gave great coverage and it dried quickly. Pictures are taken with top coat, some on the day I applied it, when it was not very sunny but luckily the sun came out a couple of days later so I was able to take a few more, and I think I've managed to capture some of its beauty.
Girly Bits Too Hot For Pants
  Girly Bits Too Hot For Pants

Friday, 17 October 2014

Stamping! Nails Inc Motcomb Street over Above the Curve Don't Blink

Today I have used my newest plate, from Moyou London's Explorer Collection, number 22. This is  beautiful plate full of delightful squirly patterns. Since it arrived just after I had painted my nails with  Above the Curve Don't Blink, I spent a day trying to decide what colour would work with the silver holo. I decided I wanted a strong enough colour to stand out, but didn't want to go for black.
In the end I chose Nails Inc Motcomb Street, thinking navy blue would go quite well. As it turned out, one coat of Motcomb Street isn't that dark and it almost has a tealy tone to it that disappears completely when worn as a solid polish. However, I think it worked quite well and I am pleased with the finished mani and the inky tone of the stamping.
I think it's safe to say I am enjoying stamping, made sightly less mess this time and was a bit more successful with picking up the images. Placement is still rather hit and miss but I think it matters less with these patterns; I have yet to try stamping a straight rectangular image onto my nails - expect a few wonky posts!!!
Nails Inc Motcomb Street over  Above the Curve Don't Blink
Nails Inc Motcomb Street over
 Above the Curve Don't Blink
  Nails Inc Motcomb Street over  Above the Curve Don't Blink
  Nails Inc Motcomb Street over  Above the Curve Don't Blink
 Nails Inc Motcomb Street over  Above the Curve Don't Blink
 Nails Inc Motcomb Street over  Above the Curve Don't Blink
 Nails Inc Motcomb Street over  Above the Curve Don't Blink


Thursday, 16 October 2014

Above the Curve Don't Blink

Today's polish is another from Above the Curve's Doctor Who collection. Don't Blink is a silver holo with dark micro glitter and tiny bright blue glitter flakies. This is a really lovely silver tone, some silvers on me are just too cold but this has a warmth that makes it very wearable. The holo is pretty strong, so far I've only seen it under artifical light, and I am running the risk of having to post this blog with no sunlight pictures :(
As with all Above the Curve polishes the formula is lovely and I got good coverage with 2 coats. The little blue flakies are pretty, capturing the light, and the dark glitters give a nice effect although I didn't get a very even distribution of them. I don't think that mattered too much as they are quite subtle, just a nice interesting addition.
So, here are the pictures, but sadly they don't do justice to how pretty this polish is. No sunlight ones I'm afraid, which means this polish is sure to come out again soon!
Above the Curve Don't Blink
  Above the Curve Don't Blink
 Above the Curve Don't Blink
 Above the Curve Don't Blink


Tuesday, 14 October 2014

Comparison post - dark shimmery greens

A couple of weeks ago when I wore Above the Curve Slitheen, I said I would do a comparison to the 2 closest greens that I have.
The 2 greens that came to mind were OPI Live and Let Die and A England Beauty Never Fails. As I went to fetch the 2 bottles from the helmer it was clear they are nothing like the same, but I thought I'd do the post anyway.
From the bottle alone, Beauty Never fails is a lot more yellow and of course has that gold shimmer. Live and Let Die also has a gold shimmer, but the base is a lot bluer, in fact is seems to have a blue smokiness to it that I hadn't remembered. In terms of green tone, Slitheen is probably between the 2 but it is holographic.
On the nail the same is true, Beauty Never Fails is a very dark olivey toned green, with the gold shimmer quite apparent, Live and Let Die does look less yellow and has that blueish cloudiness to it, and the shimmer is more subtle, and then Slitheen in daylight has a similar shimmer to the OPI, and a midway green tone. But that that's just daylight, in the sun, of course Slitheen is holographic so it's a whole different thing! Sun was being a bit evasive this week so I cheated and forced the flash, and even then couldn't properly capture it, but I knew it was there.
So ... similar, but NOT the same - do I need all three? they are dark green so of course I do, but if I only wanted 1 dark green in my collection and I HAD to choose, Slitheen would win, Beauty Never Fails would be 2nd, and Live and Let Die would come 3rd. But it is my collection and I get to keep all 3 :)
ATC Slitheen,  OPI Live and Let Die,  AE Beauty Never Fails
from top to bottom : ATC Slitheen,
OPI Live and Let Die,
AE Beauty Never Fails
 ATC Slitheen,  OPI Live and Let Die,  AE Beauty Never Fails

Sunday, 12 October 2014

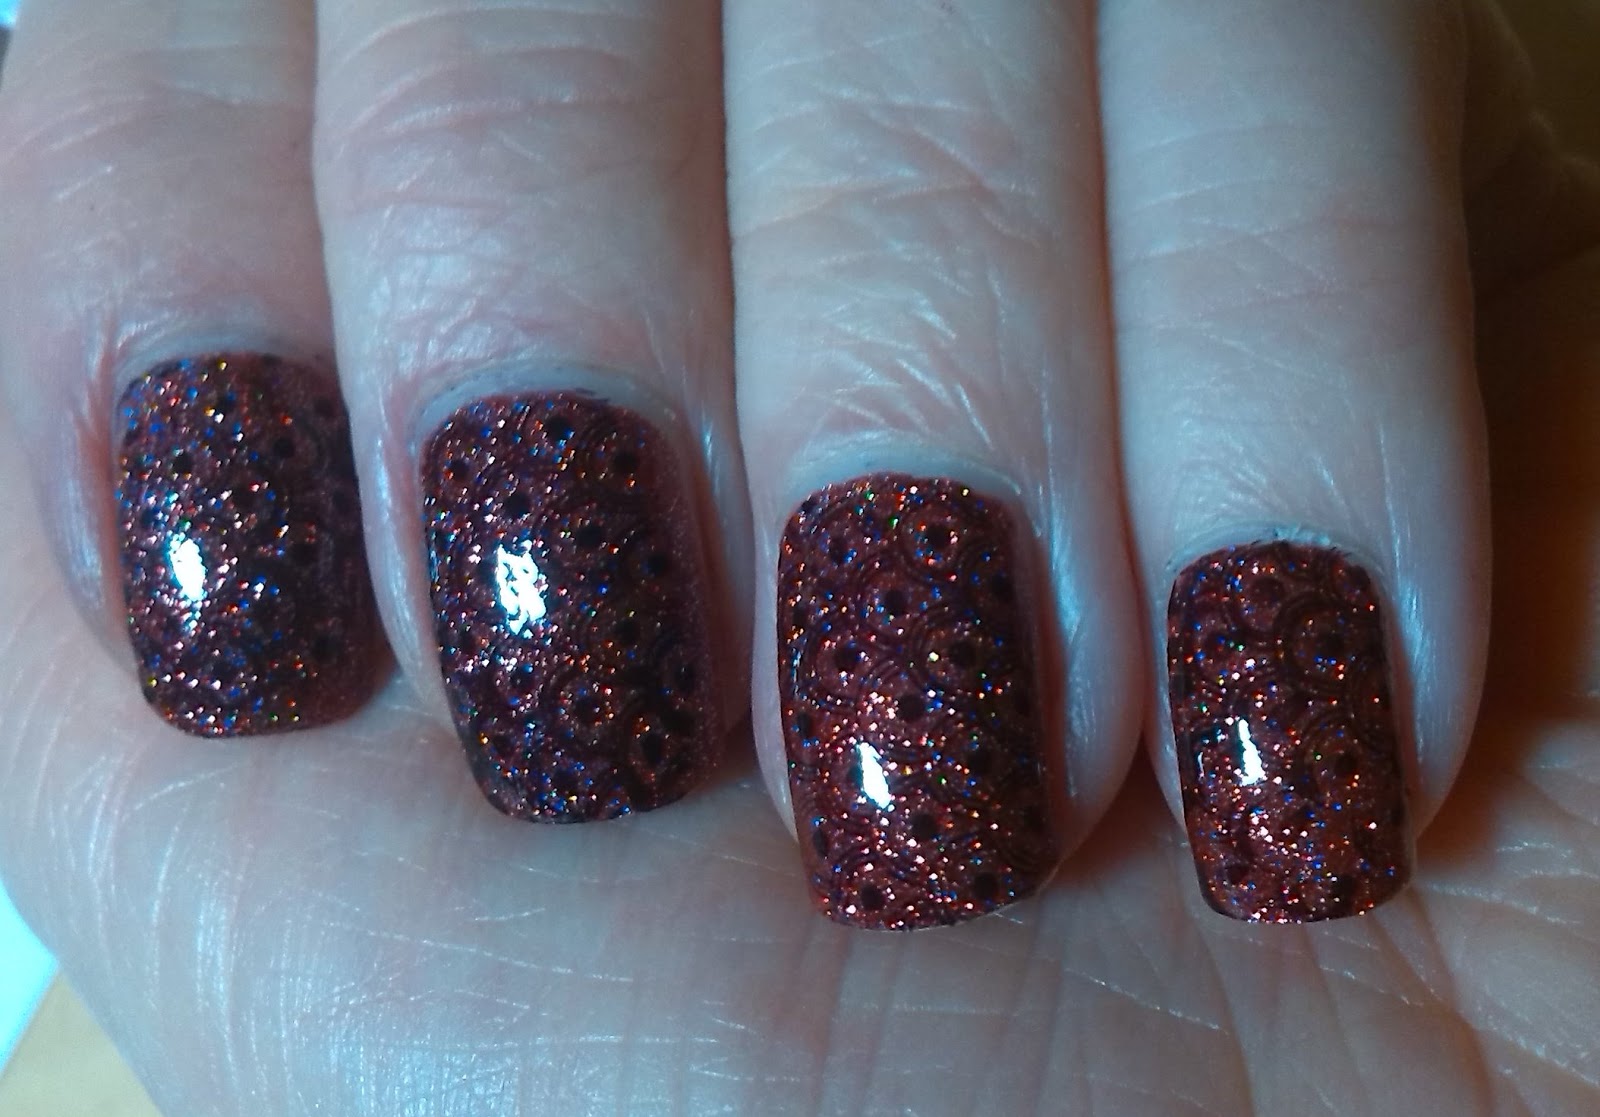
Stamping! A England Lancelot over Smitten Penny Dreadful

I am so excited to show you my latest stamping efforts. My gorgeous Smitten Penny Dreadful was starting to look a bit chipped, so I thought I'd try out my new stamping plate, and rectangular stamper before taking the Smitten off.
The plate is from Moyou London's Suki Collection, number 01. I was going to try the tiger stripes from the centre of the plate but I realised that the image was not large enough so I went for the section in bottom right, which was almost big enough to fit most nails.
I primed the stamper as per a number of tutorials I had read and watched, that made a big difference, and made a number of rough stamps on paper first. This was my first attempt to cover whole nails for a full mani and although I know I have missed a few bits, on the whole I am pretty blown away by how cool this looks!!! Initially I had planned to test the plate, and then take the mani off and re-do my nails, but no way! This is just so pretty, it has now been on for 3 days.
A England Lancelot stamped like a dream, and any concerns that stamping may not work over the very glittery Smitten were pushed aside when I saw the result. I can't get over how the glitter still sparkles despite the stamping, I am just mesmerised by the effect! I want to try more and more stamping over glitter!
Too many pics, as usual, but I wanted to capture how pretty this is. With Lancelot being a black red, the overall colour is more of a red/ deep pink, the copperyness of the Smitten seems to have gone but I love seeing how these polishes interact, and how they vary in different lights.
A England Lancelot over Smitten Penny Dreadful
 A England Lancelot over Smitten Penny Dreadful
 A England Lancelot over Smitten Penny Dreadful
 A England Lancelot over Smitten Penny Dreadful
 A England Lancelot over Smitten Penny Dreadful
 A England Lancelot over Smitten Penny Dreadful
  A England Lancelot over Smitten Penny Dreadful

Saturday, 11 October 2014

Smitten Polish Penny Dreadful

I have a real sparkly treat to share with you today. Yet another purchase from the wonderful Rainbow Connection, Smitten Polish's Penny Dreadful is one of Smitten's new Autumn polishes and it is just so sparkly, I can't take my eyes off it!!!
I am not sure exactly what drew me to this polish but I just had to have it. The colour just looked so autumnal, so I put aside my concerns that I have tried coppery brown polishes in the past and not liked them on me at all. I am so glad I went with my instincts as the minute I put the first coat on, I was quite literally smitten :)
The base is quite sheer and it is a warm pink when swatched on white paper. It is absolutely packed with tiny coppery holographic glitter. It sparkles with every colour of the rainbow and the overall shade on the nail is difficult to pin down, in some lights quite pink, then more coppery and then quite red. Despite being a sheer base coverage with 2 coats was perfect, the wonderful quantity of glitter easily hiding the dreaded vnl! Topcoat moved it to another level, such extreme sparkliness!
I am completely in love with polish, it screams AUTUMN, and it is so pretty! I expect I would not be so in love with a cream polish in the same shade, it is the glitter that really makes this polish special, and completely unique in my collection - nothing I own is remotely like this!
OK, so you get that I love it, imagine how many pictures I took!! Don't worry, very heavily edited but I have included sunshine and shade pics to show the various colours and my camera even managed to pick up some of the holo sparkle.
Smitten Penny Dreadful
 Smitten Penny Dreadful
 Smitten Penny Dreadful
 Smitten Penny Dreadful
 Smitten Penny Dreadful
 Smitten Penny Dreadful
 Smitten Penny Dreadful
Smitten Penny Dreadful
just look at that sparkle!


Tuesday, 7 October 2014

Stamping over watercolour mani

As promised, here's what happened when I tried stamping over my watercolour mani.
I had a new plate to try but after over an hour of unsuccessful attempts on paper I gave up on that plate and went back to one I'd used before, Moyou London's Mother Nature Collection, number 11.
I only wanted one flower for each nail, so after faffing around cleaning images off the stamper before stamping, and cleaning excess stamping off my nails, I ending up creating a small mask with a piece of paper. I laid this over the plate after scraping and then only picked up the rose in the very corner. This worked well, and I was quite pleased with my efforts. I had seen someone use a mask on their nail to stamp only in one area so it was similar idea.
I did do one nail fully stamped, just to see how well it worked too, but just have 1 flower and a few stray bits on all the other nails.
I had been thinking to stick with Nails Inc, but my pink was too pale and wouldn't stamp so I went with Kiko 402 Jewel Pink. The end result was obviously no longer remotely like Monet Waterlilies, and I felt it still needed something. I'd rather run out steam for stamping leaves so I just used a dotting tool and Nails Inc Queen Victoria Street for a few leaves.
I think they look a bit Cath Kidston, my husband and son said they looked like Roses Chocolates :)
My nail art and stamping efforts are a bit hit and miss, but I am learning quite a bit, having fun and I do like what I ended up with here.
I've included pics of both hands for once, having done the full nail stamping on the other hand in case it was a complete disaster!!
Stamping over watercolour mani
 
Stamping over watercolour mani
 
before I added the leaves