Showing posts with label Nails Inc Kate Spade New York Noir. Show all posts

Monday, 4 January 2016

When Colours Collide - Black and Gold

Black and Gold for #whencolourscollide.
I used SV by Sparkly Vernis Gilded Lemon Drops and UberChic UC 1-03 over Nails Inc Kate Spade New York Noir.
I had a problem that I don't usually have - the Gilded Lemon Drops were so holo and the sun was shining, I had to wait for the sun to go in to actually get a picture of it looking gold! it was SO holo it was like a rainbow!!
UberChic UC1-03 and  SV by Sparkly Vernis Gilded Lemon Drops
UberChic UC1-03 and
SV by Sparkly Vernis Gilded Lemon Drops
 UberChic UC1-03 and  SV by Sparkly Vernis Gilded Lemon Drops
UberChic UC1-03 and  SV by Sparkly Vernis Gilded Lemon Drops
 UberChic UC1-03 and  SV by Sparkly Vernis Gilded Lemon Drops


Monday, 16 February 2015

Stamping! FUN14 and a voyage of discovery with leadlighting

I keep seeing leadlight manis and although I have used some leadlight plates, and tried some of the techniques I haven't really done a proper leadlight mani.
I thought I would try the tulip image on the Fab Ur Nails FUN14 plate. I was all set to paint my nails white, stamp in black and then colour the image, but for some reason I decided to switch plans and start with a black base. I figured if  stamped in white I could still use leadlighting techniques to colour the outlines.
I started with a base of Nails Inc Kate Spade New York Noir, and stamped the image using Essence Stampy 001. I think they look quite sweet but a bit abstract, and I was hoping that by adding some colour the image would look better, ie. green stalks, red flowers.
I decided to try the two Sally Hansen Triple Shines that I managed to find in Poundland, but they were just too sheer. They would probably have been fine if I had stamped black on white and had a larger image to colour.
I was about to give up and resort to Sharpies but I thought maybe I should try some other options. I tried mixing ordinary polish with top coat on a plastic mat but they were too sticky and dried too quickly and then I had the bright idea of adding the ordinary polishes to the Triple Shines. I added a drop of Nails Inc Kate Spade Big Apple Red to Sally Hansen Jell-ous, and a drop of Nails Inc Queen Victoria Street to Sally Hansen Sea-Through and mixed them on the plastic mat. Relative success at last but boy it takes an age to colour in using the dotting tool! and even longer on the other hand as my left hand is really shaky as soon as it is required to do anything detailed. I rather hoped the untidy colouring would look cool, like a water colour but not so sure now. I also think I may have added too much colour.
Anyway, here is the end result, not a major success, but another learning experience - I am determined to master this!
The pictures aren't great either as it was dark by the time I'd finished!
Fab Ur Nails FUN14
Fab Ur Nails FUN14
 Fab Ur Nails FUN14
Fab Ur Nails FUN14 and some leadlighting
   Fab Ur Nails FUN14 and some leadlighting


Wednesday, 11 February 2015

Stamping! Valentine's Mani with A England Her Rose Adagio and Moyou London Princess 14

Well of course I had to do a Valentine's mani - actually this is my 2nd one, the other one is still a secret!!
I am not really a pink kind of girl so of course I started with a black base, Nails Inc New York Noir, and then I did a red saran wrap thing over it using a dark red by Manhattan. That gave me a lovely black red marbled base to stamp over and I chose the pretty interlocking hearts on Moyou London's Princess 14 plate. I stamped with A England Her Rose Adagio and I love the finished result!
The A England polishes stamp beautifully and Her Rose Adagio gave this mani a really pretty delicate look. There was no sun today so the outdoor shots show Her Rose Adagio to be a silvery shimmery polish, but the indoor shots under the LED lamp have picked up the holo really nicely. In both lights I think it looks lovely and I like the contrast with the glossy marbled base - pretty pleased with this one.
A England Her Rose Adagio  and Moyou London Princess 14
Valentines Mani with A England Her Rose Adagio
and Moyou London Princess 14
A England Her Rose Adagio  and Moyou London Princess 14
 A England Her Rose Adagio  and Moyou London Princess 14
 A England Her Rose Adagio  and Moyou London Princess 14
A England Her Rose Adagio  and Moyou London Princess 14
 A England Her Rose Adagio  and Moyou London Princess 14

Black and red saran wrap mani

Saturday, 15 November 2014

Above the Curve Relative Dimensions and Smart nail art stencils

Today I would like to show you these really cool nail stencils. I saw them on another blog a week or so ago and thought they looked interesting. They are available here and they have an offer of 25% off this month with code NOV25, so I thought it would be a good time to try them.
They took about a week to arrive from Romania, nicely packaged with clear, straight forward instructions. You get 10 in each pack and although not designed to be reused, if you are careful you should get more than one use from them. I watched a few videos on how to apply them too, and you can get some tips on how to take care of them.
I decided to use Above the Curve Relative Dimensions over a base of Nails Inc New York Noir. I hadn't used Relative Dimensions before but I did a quick swatch on paper to see if it was opaque enough for one coat. This is one of the Doctor Who polishes, and it is a stunning holographic purple. Obviously if you were using it for a full mani you'd do 2 coats, but it's opaque enough over black to get away with one coat. (I will review it properly with a full mani soon)
So, I painted my nails with 2 coats on New York Noir, and then I top coated them, mainly because I've learnt from stamping that you've got a better chance of cleaning off and redoing the image if you make a mistake.
I found these relatively easy to use, easier than the nail vinyls I used for stripes the other day because you are only placing 1 stencil for each time, (lining up 2 stripes was very challenging!). I guess I also learnt a few things with the stripes which helped on these too. My biggest challenge this time was sticking the stencil down firmly enough - as I realised last week my nails are very curvey and the flat sticker does need to be pressed down very firmly to avoid polish bleeding underneath.
The next challenge was that despite ordering 10 different patterns, the one I chose today (P057) looks like the widest pattern they do and my nails are not particularly wide. My little fingers are so narrow I ending up just using part of the pattern, but I think that worked well in the end.
I am really impressed with the outcome. I did redo a couple, one where my placement was really off, and one where I didn't press it down enough and the colour leaked. On the whole placement is easy as they are transparent, so you can see where you are putting it.
The ATC polish worked brilliantly, definitely enough coverage from one coat. The holo is really strong and looks fantastic over the glossy black. I am really very pleased with the overall look and I am looking forward to trying the other stencils I bought.
I just love these holographics swirls contrasting against the glossy black, they make me think of outer space, maybe there's a Tardis out there!
Above the Curve Relative Dimensions and  Smart nail art stencil P057
Above the Curve Relative Dimensions and
Smart nail art stencil P057
  Above the Curve Relative Dimensions and  Smart nail art stencil P057
Above the Curve Relative Dimensions and  Smart nail art stencil P057
 Above the Curve Relative Dimensions and  Smart nail art stencil P057
Above the Curve Relative Dimensions and  Smart nail art stencil P057

Thursday, 30 October 2014

A2Z Series - A is for Angles

Well, the big day is here! This is the first day of a new challenge, and I was very excited to be asked to join in with this latest A2Z series, although I have to say, the closer the day got the more nervous I was!
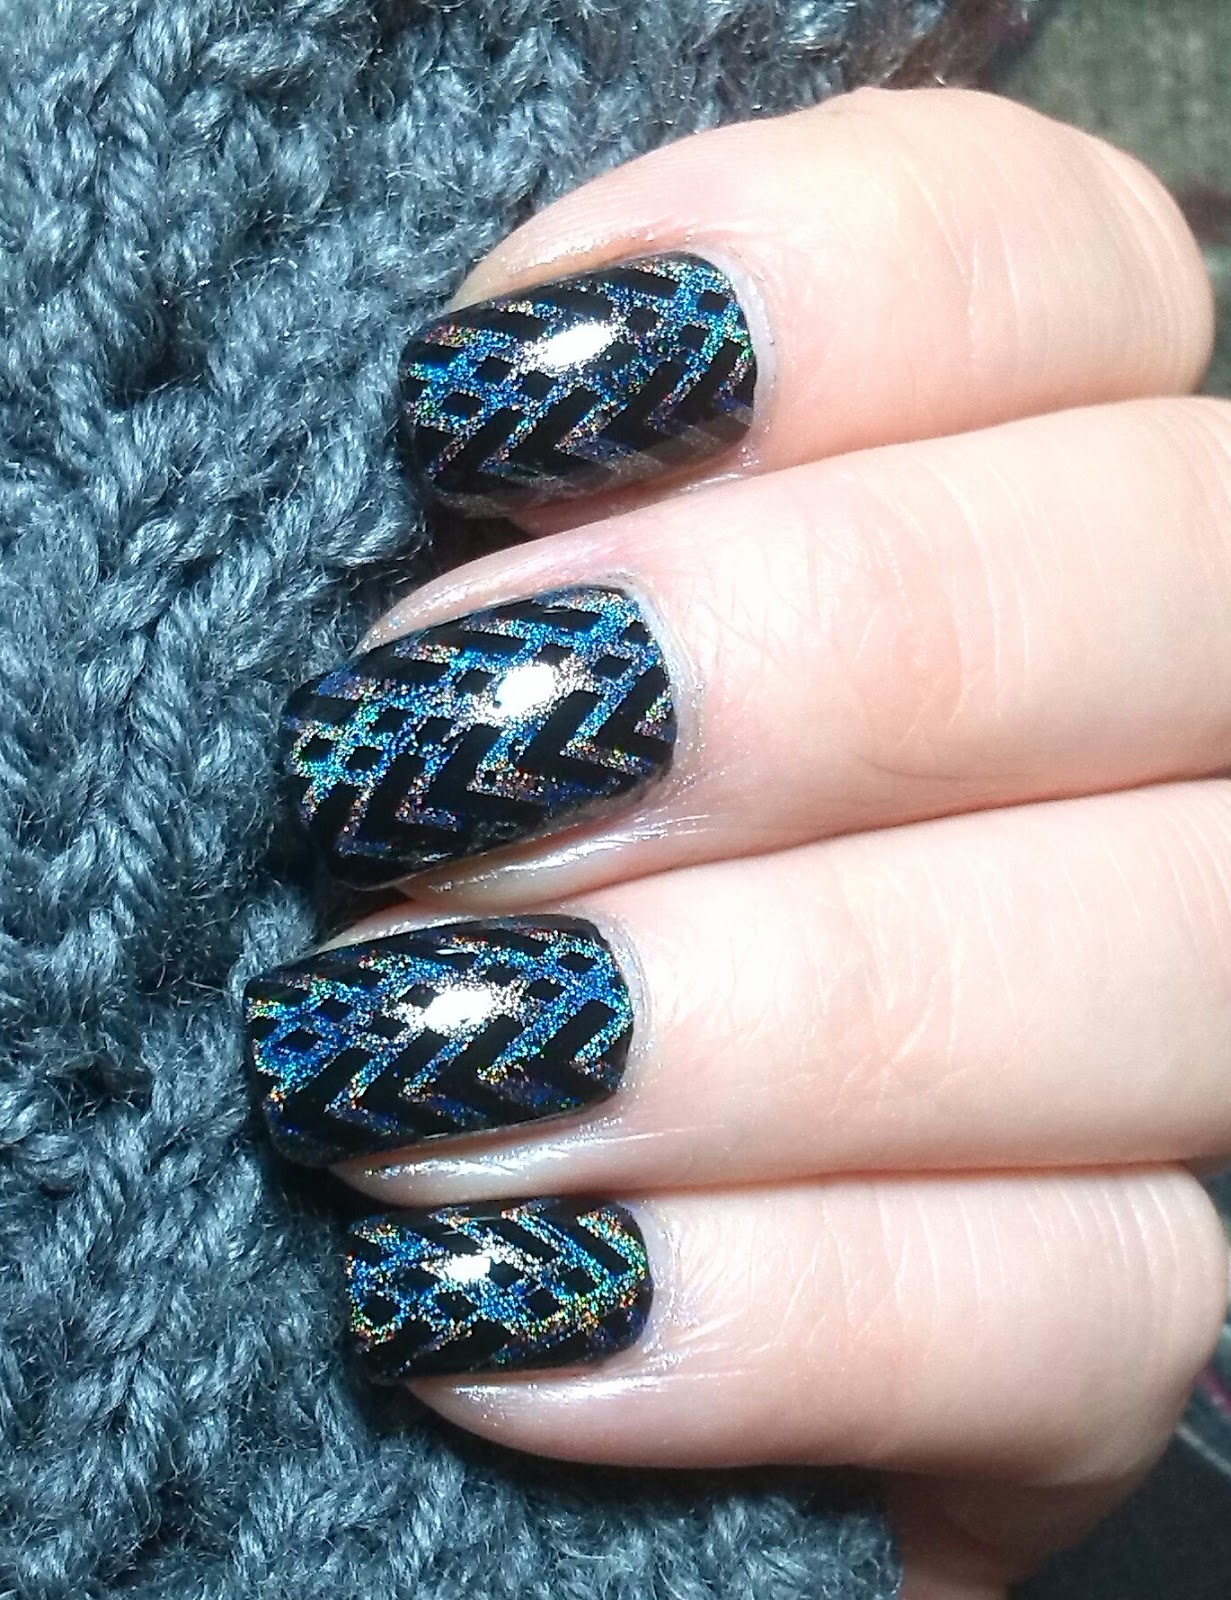
Anyway, the prompt is Angles, and I decided as I am newly into stamping I'd look for a good image that included angles. I found this wonderfully geometric one with overlapping chevrons on CICI&SISI 08 so that's what I have used today. I really like this image, it's quite Art Deco I think! My base is 2 coats of Nails Inc Kate Spade New York Noir, and I have stamped with Too Fancy Lacquer Prima Donna. This polish stamped really well, I haven't worn it before but it looks like it would give excellent coverage and has a really strong holo.
The pale silvery lilac holo looks great against the black in bright light, although it does fade to a greyish shimmer in lower levels of light. I got caught out by the sun setting too quickly and had to take my pictures indoors which is a real shame but otherwise I am quite pleased with how this turned out.
‪#‎A2Znails‬
A is for Angles -
Too Fancy Lacquer Prima Donna
and Nails Inc New York Noir
 ‪#‎A2Znails‬
‪#‎A2Znails‬
‪#‎A2Znails‬
 ‪#‎A2Znails‬
 ‪#‎A2Znails‬
‪#‎A2Znails‬
daylight - no sun!
 

Look HERE to see what everyone else got up to, and click on the InLinkz too  - sorry, the thumbnail pics won't come up on my post.