Showing posts with label Smart nail art stencils. Show all posts

Thursday, 24 March 2016

March Challenges - Rainbow glitter placement

Rainbow glitter placement for #wnac2016 - I think I should have gone with my first instinct which was to skip this one! I didn't have any loose glitter or any polishes with large enough glitter to move around so I decided maybe I could get away with using nail stencils to control where the glitter went.
I used Smart Nail Stencils P053, because it looks a bit like a rainbow and Glam Polishes Tickled Pink, Which Witch? and Patty O'Green.
I decided, perhaps not that wisely, to make decals ahead of time to make it easier ... ?? maybe not.
Anyway, I painted my nails black, and applied the decals. They were too brittle so they did not apply particularly well and no amount of top coat would make them sit nicely.
The pictures look passable but they felt awful - I really need to work out where I am going wrong with these.
(and because I took a picture of the sorry little things, you get to see them before they went on my nails - looking all innocent in their box!)
rainbow glitter!


Monday, 16 November 2015

November Challenges - Nails Inc Grosvenor Crescent and Stencils

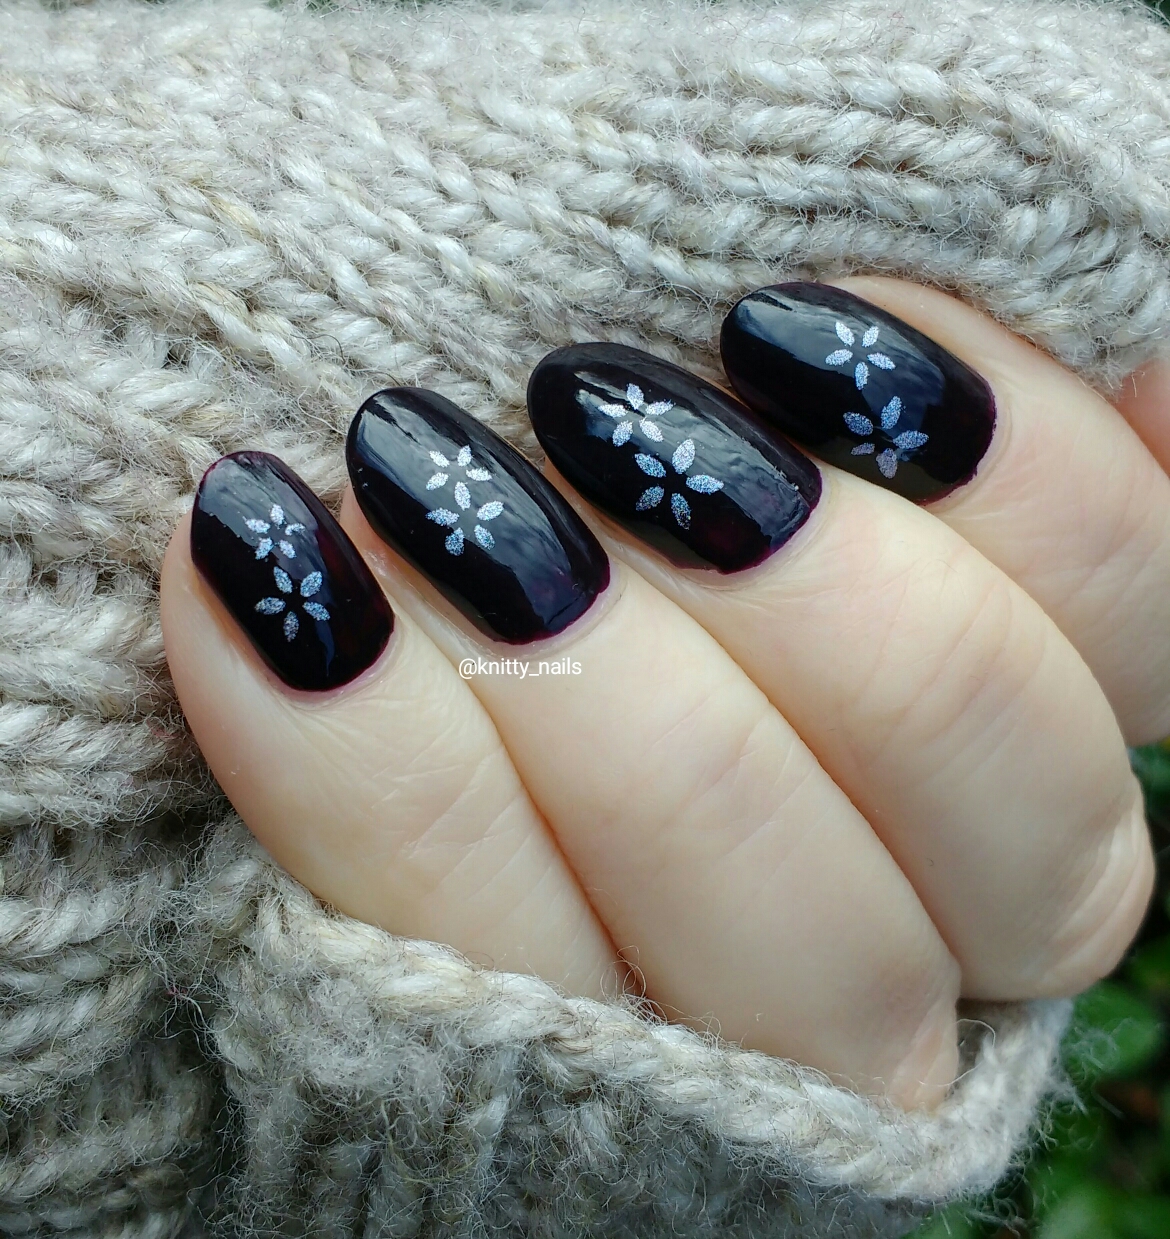
The prompt was Stencils for #clairestelle8nov - I decided to use the Smart nails stencils that I recently won in a giveaway.
I started with a base of Nails Inc Grosvenor Crescent which was one of the freebies in Glamour magazine recently. This is a dark red/purple creme. It applied beautifully.
I wore that for a day, just to make sure it was really dry and because I loved it.
Then I used the stencil P048 and SV by Sparkly Vernis Blurple Ice Cubes. Because this is quite a small image (and you get different sizes for each finger) I was able to use these quite easily as the wrinkling I get from my curvy nails was away from the actual pattern. I think these worked rather well and I loved the contrast of the super holo Blurple Ice Cubes and the glossy Grosvenor Crescent.
Nails Inc Grosvenor Crescent

Smart Nails Art Stencil P048

Monday, 12 January 2015

Stripey nails with Smart Nail Art Stencils

For today's mani I decided to have another play with my nail stencils. I bought these from smART nails and they have a free postage offer during January 2015 so a great time to buy a few.
I decided to try the stripes (P018) and I chose A England Rose Bower as I was wearing Cadillaquer Days Gone Bye (black with red glitter), and the dark pinky reds are similar enough I think to make this work. I thought it would be nice to try the stripes with this pretty glitter, just to see how it looked really, and I am pretty pleased with the finished result although I do keep thing Dennis the Menace!!
The stencils are fun to use. I had a couple of issues that I think it's worth mentioning. Lift the corners from the base paper before you start, they are a bit tricky to get hold of, even with tweezers and you don't want to mess up your nails :) also, I found you need to press them down pretty firmly and then paint straight away- on my very curvey nails they started to lift at the edges so don't decide to apply all 5 then paint - do one and then paint, then do the next. That's what worked for me anyway.
The last 2 pictures were taken yesterday and the light was awful, the others were taken this morning - not sunny but better light.
On the whole I am pleased with this mani, I wondered about doing one less stripe on the little finger as it's so small but I think it's OK and next time I use this stencil I am going to try them at an angle.
Stripes using smART nail stencils P018
Stripes using smART nail stencils
  Stripes using smART nail stencils P018
 Stripes using smART nail stencils P018
 Stripes using smART nail stencils P018
 Stripes using smART nail stencils P018
  

Saturday, 15 November 2014

Above the Curve Relative Dimensions and Smart nail art stencils

Today I would like to show you these really cool nail stencils. I saw them on another blog a week or so ago and thought they looked interesting. They are available here and they have an offer of 25% off this month with code NOV25, so I thought it would be a good time to try them.
They took about a week to arrive from Romania, nicely packaged with clear, straight forward instructions. You get 10 in each pack and although not designed to be reused, if you are careful you should get more than one use from them. I watched a few videos on how to apply them too, and you can get some tips on how to take care of them.
I decided to use Above the Curve Relative Dimensions over a base of Nails Inc New York Noir. I hadn't used Relative Dimensions before but I did a quick swatch on paper to see if it was opaque enough for one coat. This is one of the Doctor Who polishes, and it is a stunning holographic purple. Obviously if you were using it for a full mani you'd do 2 coats, but it's opaque enough over black to get away with one coat. (I will review it properly with a full mani soon)
So, I painted my nails with 2 coats on New York Noir, and then I top coated them, mainly because I've learnt from stamping that you've got a better chance of cleaning off and redoing the image if you make a mistake.
I found these relatively easy to use, easier than the nail vinyls I used for stripes the other day because you are only placing 1 stencil for each time, (lining up 2 stripes was very challenging!). I guess I also learnt a few things with the stripes which helped on these too. My biggest challenge this time was sticking the stencil down firmly enough - as I realised last week my nails are very curvey and the flat sticker does need to be pressed down very firmly to avoid polish bleeding underneath.
The next challenge was that despite ordering 10 different patterns, the one I chose today (P057) looks like the widest pattern they do and my nails are not particularly wide. My little fingers are so narrow I ending up just using part of the pattern, but I think that worked well in the end.
I am really impressed with the outcome. I did redo a couple, one where my placement was really off, and one where I didn't press it down enough and the colour leaked. On the whole placement is easy as they are transparent, so you can see where you are putting it.
The ATC polish worked brilliantly, definitely enough coverage from one coat. The holo is really strong and looks fantastic over the glossy black. I am really very pleased with the overall look and I am looking forward to trying the other stencils I bought.
I just love these holographics swirls contrasting against the glossy black, they make me think of outer space, maybe there's a Tardis out there!
Above the Curve Relative Dimensions and  Smart nail art stencil P057
Above the Curve Relative Dimensions and
Smart nail art stencil P057
  Above the Curve Relative Dimensions and  Smart nail art stencil P057
Above the Curve Relative Dimensions and  Smart nail art stencil P057
 Above the Curve Relative Dimensions and  Smart nail art stencil P057
Above the Curve Relative Dimensions and  Smart nail art stencil P057