Showing posts with label Nails Inc Royal Botanical Gardens. Show all posts

Sunday, 15 May 2016

May Challenge - A Smoosh and Water Spotting

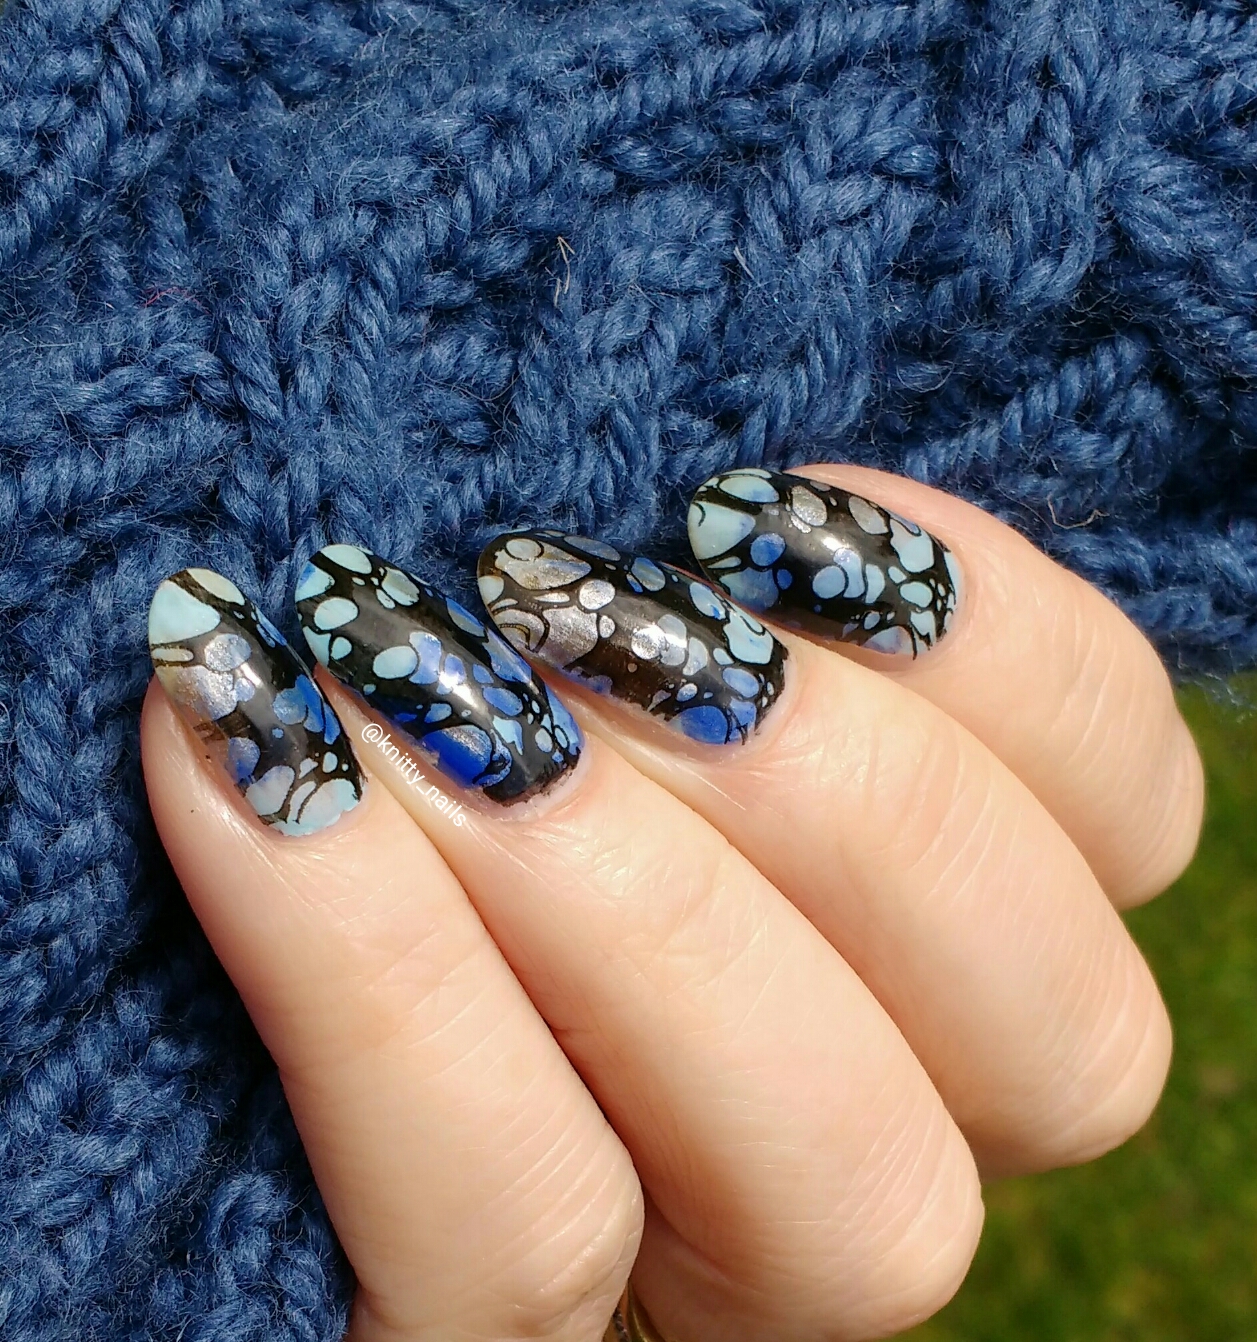
This week's smoosh was Cobalt Blue, Aqua and Silver - I used Nails Inc Instyle Oregon's Out (looks like Baker Street to me), Royal Botanical Gardens and Kate Spade Soho Silver.
Soho Silver is not really thick enough to smoosh with and the pictures are awful, not sure if it was poor light or what - it did look a lot better in real life.
Then the next prompt was Water Marble / Spotting for #firedazedchallenge - well you all know I don't do water marbling/spotting unless I can stamp it so here was a chance to use Hehe 081 which I have used with Essence Stampy 002. I think this worked well over the smoosh. This is a great plate, it has a central floral bit too like the others in this range but I just used the water spotting part for this mani.
#smooshynailsunday
Hehe 081 with Essence Stampy 002
 Hehe 081 with Essence Stampy 002


Friday, 9 October 2015

40 Great Nail Art Ideas - Teal and Patchwork

Today's prompt for 40 Great Nail Art Ideas was Teal & Patchwork - we all have the same colour but a different pattern - I got patchwork!
Well, this was a challenge and a half! Having established I had no suitable stamping plates, I decided to make decals on the Uber mat, cut them up and use them over the damask mani that I had done earlier using Nails Inc Gosfield Street and Colors by Llarowe Thing 1 & Thing 2.
To make the patchwork pieces, I started with bases of Barry M Coconut and Nails Inc Royal Botanical Gardens on the Uber mat and then I stamped stripes and spots using Nails Inc Gosfield Street and Apipila Super Plate A. I added the stitching with a Sharpie once I had applied the decals to my nails.
On my right hand I rather ran out of time so I painted directly over the damask, used a dotting tool for the spots and a blue Sharpie for the rather wobbly stripes!
Finally I added a coat of Barry M Matte top coat.
On reflection, I think the right hand probably looks better but I thought I'd show them both. This was certainly one of those manis that looked perfect in my mind and didn't quite come off like that. all good practice though!
Teal and Patchwork
Teal and Patchwork
Teal and Patchwork
Teal and Patchwork

Monday, 9 March 2015

Dry Watermarbling with Nails Inc Royal Botanical Gardens and Instyle Power Pink

Today I thought I'd have a try at dry watermarbling. This is where you create the water marbled pattern in a cup of water, but then leave it to set for a couple of hours. Then you carefully lift it out, lay it on some tissue to dry and then cut up it so that you can apply it to your nails like decals.
I used Nails Inc Royal Botanical Gardens and Instyle Power Pink. I figured the cup was a bit small so I took the precaution of painting my nails with Nails Inc Royal Botanical Gardens so if I didn't have enough decal it wouldn't be the end of the world (well it wouldn't anyway but you know what I mean).
To my enormous surprise it did dry and I was able to lift the pattern out intact. I cut it into pieces and then one by one I top-coated my nails and added a piece of the pattern. I tried to press it down fairly firmly before the decal completely dissolved but did have the same issues as I do with stencils and nail vinyls - flat surfaces and curved nails don't go.
Another coat of top coat once I had trimmed and cleaned up did sort some of it out, but it wasn't perfect, so I hid the imperfections under a coat of Dance Legend Top Sahara!!
I can still see some imperfections but it looks pretty, I love the two colours together and I am encouraged enough to want to try it again!
Who would have thought a year ago I would wear a water marbled mani, with pastel bluey/teal and pretty pink, and what's more I really like it!!!
Dry Watermarbling -
Nails Inc Royal Botanical Gardens and Instyle Power Pink
 

Monday, 6 October 2014

Watercolour mani with Nails Inc pastel shades

As I mentioned on my last post, my previous mani was intended as a base for nail art. This is what I did with it...
I think I mentioned I had joined a group run by Debbie from The Crumpet, to learn some basic nail art. There are week by week tutorials to follow, but I joined late so I am catching up, mainly with the ones that interest me most. Last week I decided to try the watercolour mani.
I chose greens and blues, and at the back of my mind was something very pretty like Monet's Waterlilies. A quick check of Google showed that the colours were nothing like Monet's but never mind!!
I had the soft green base of Nails Inc Holland Park Gardens, and the other 3 colours I chose were also Nails Inc, mainly because I have polishes in the colours I wanted to use, rather than any specific desire not to mix brands. I chose Bluebell, a slightly lilacy blue, Royal Botanical Gardens and St James Square, 2 very pretty tealy pastel shades, St James Square being bluer and a touch darker.
I followed Debbie's tutorial and this is what happened.
I couldn't quite decide when I'd finished whether its looked really good or a complete mess, but comments I received were mostly positive, and actually it really grew on me. Initially I had intended to do some stamping on top straight way but I decided to wear it on its own for a coupe of days and then I was too worried about spoiling it. The stamping bit will now get a separate post.
Watercolour mani with Nails Inc pastel shades
 Watercolour mani with Nails Inc pastel shades
Watercolour mani with Nails Inc pastel shades
 Watercolour mani with Nails Inc pastel shades
Watercolour mani with Nails Inc pastel shades
 Watercolour mani with Nails Inc pastel shades